Download the chatbot template and upload it to the Chatbots page:
/ai-gpt-chatbot-native.zip
Go to the chatbots page and Open this chatbot for editing. On the next screenshot, you can see how the chatbot looks.
The blocks of the chatbot are marked by numbers so that it is convenient to work with the instructions in the future and it is clear what needs to be configured.
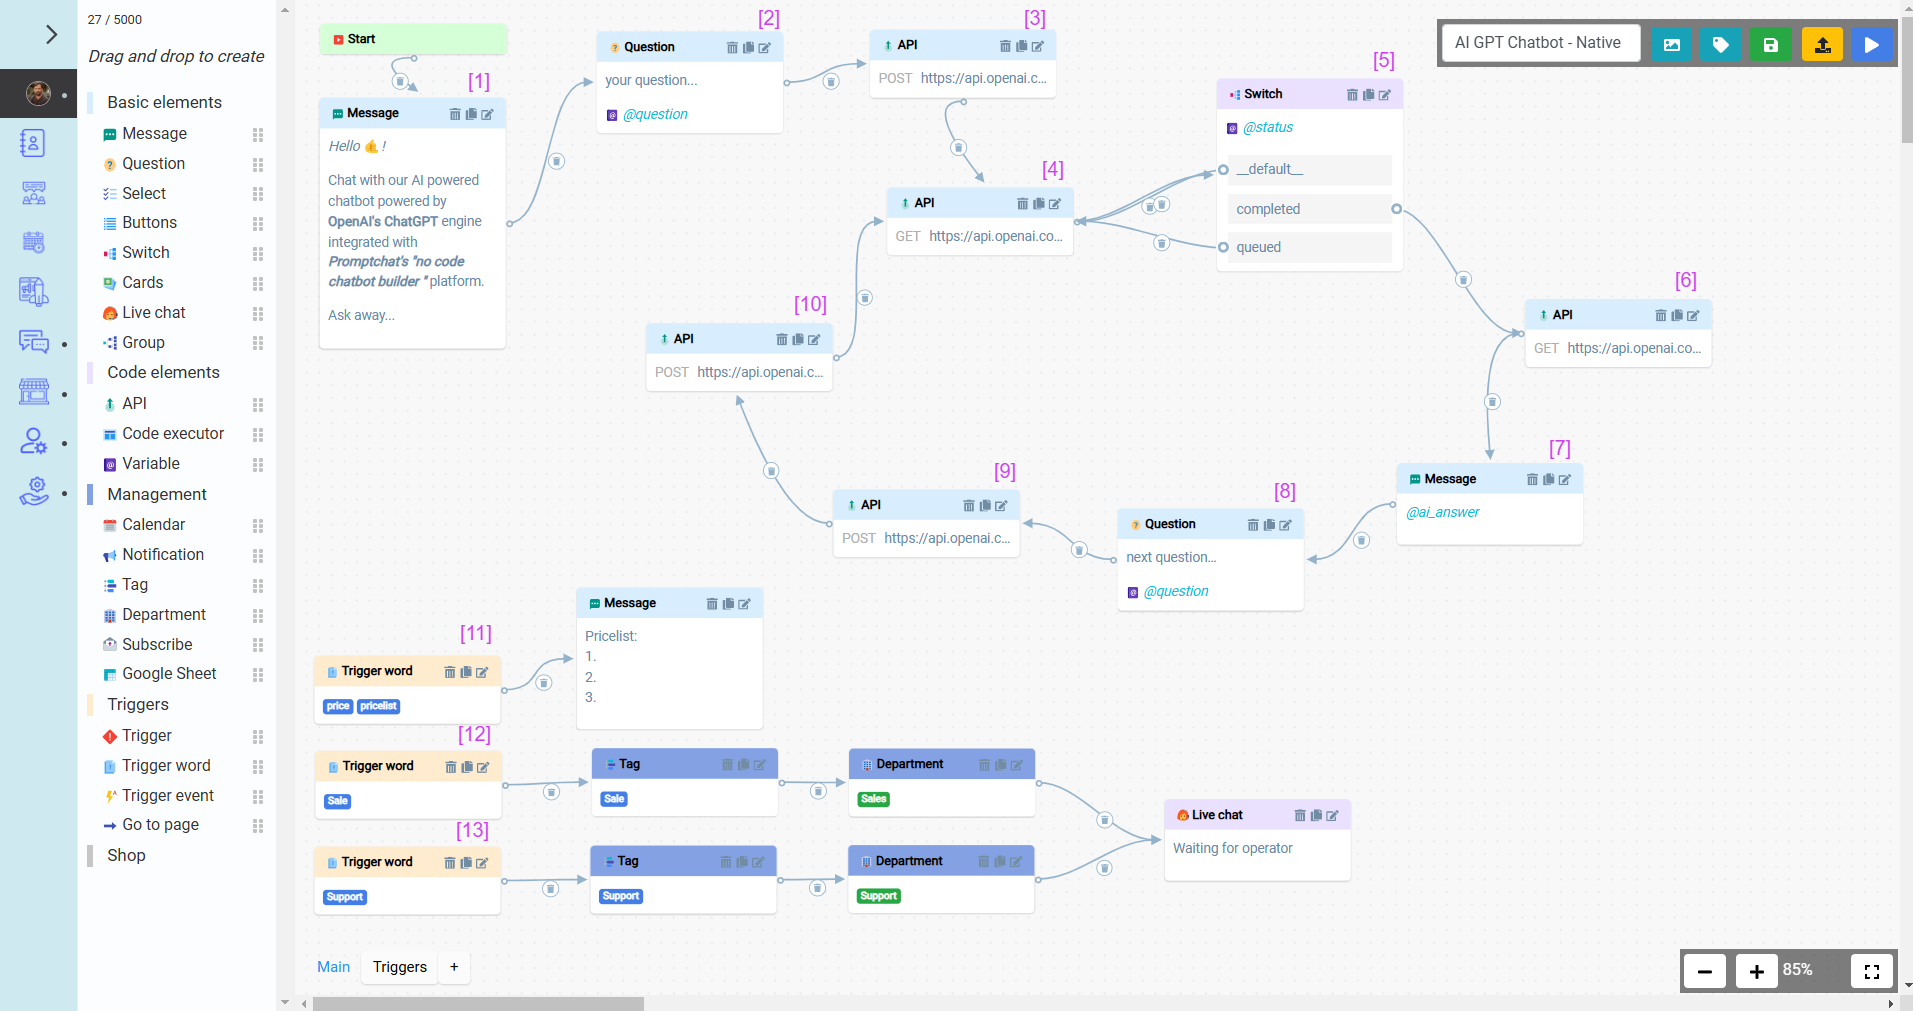
[1] - Message block. Containing information about the chat bot.
[2] - Question block. The client’s response to this block will be written to the variable specified in this block. This block will be used for the client’s first question.
*Note that the 'question block' can be left empty without text, but it will still wait for the client to enter a question
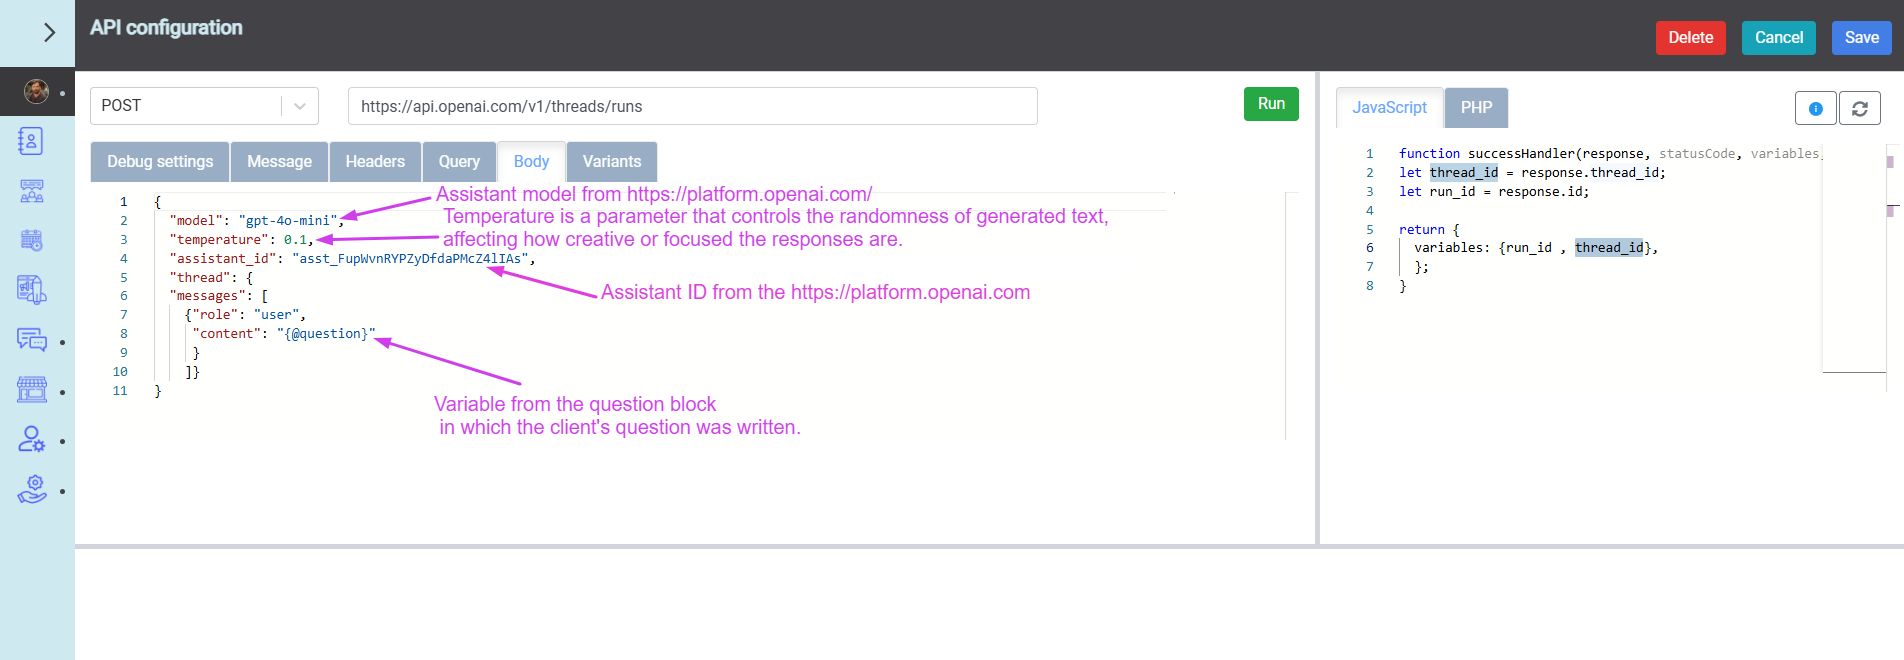
[3] - API block. The initial request must be made to start the Run and Thread and to obtain the 'run_id' and 'thread_id.'
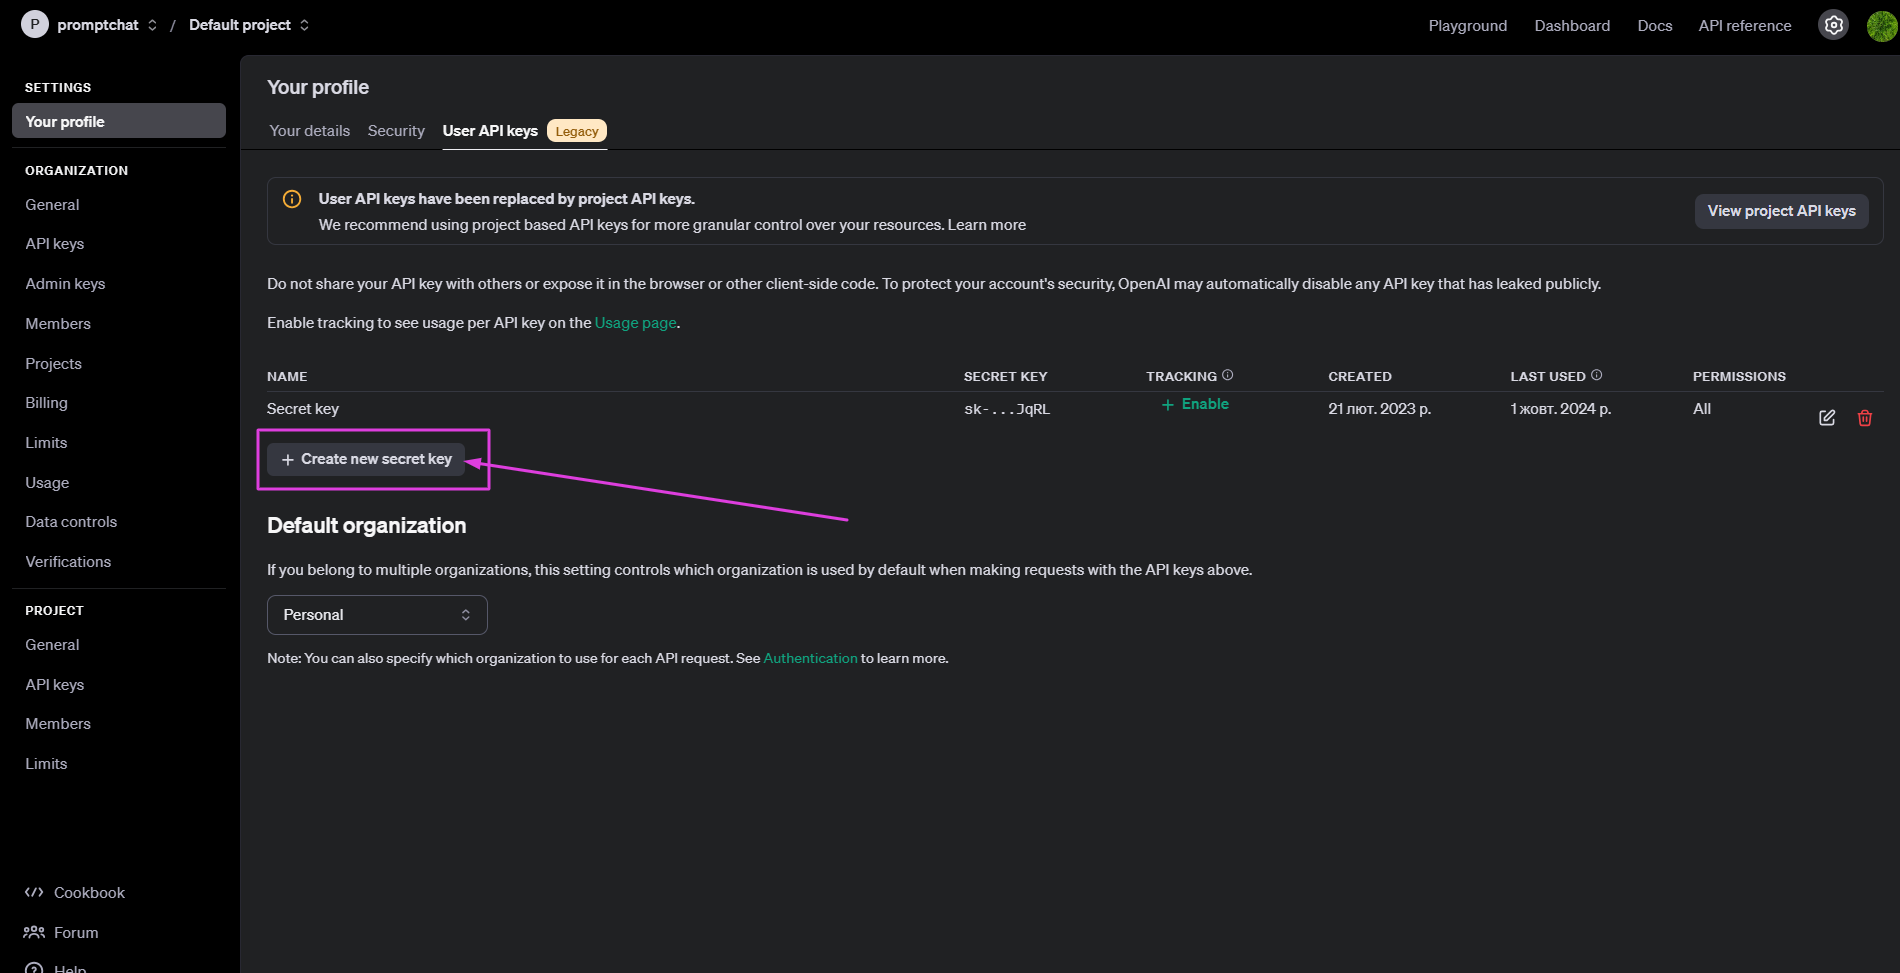
Next, interaction with the OpenAI platform will be required. After registering on this platform and going to this link https://platform.openai.com/settings/profile?tab=api-keys you need to generate an API key.
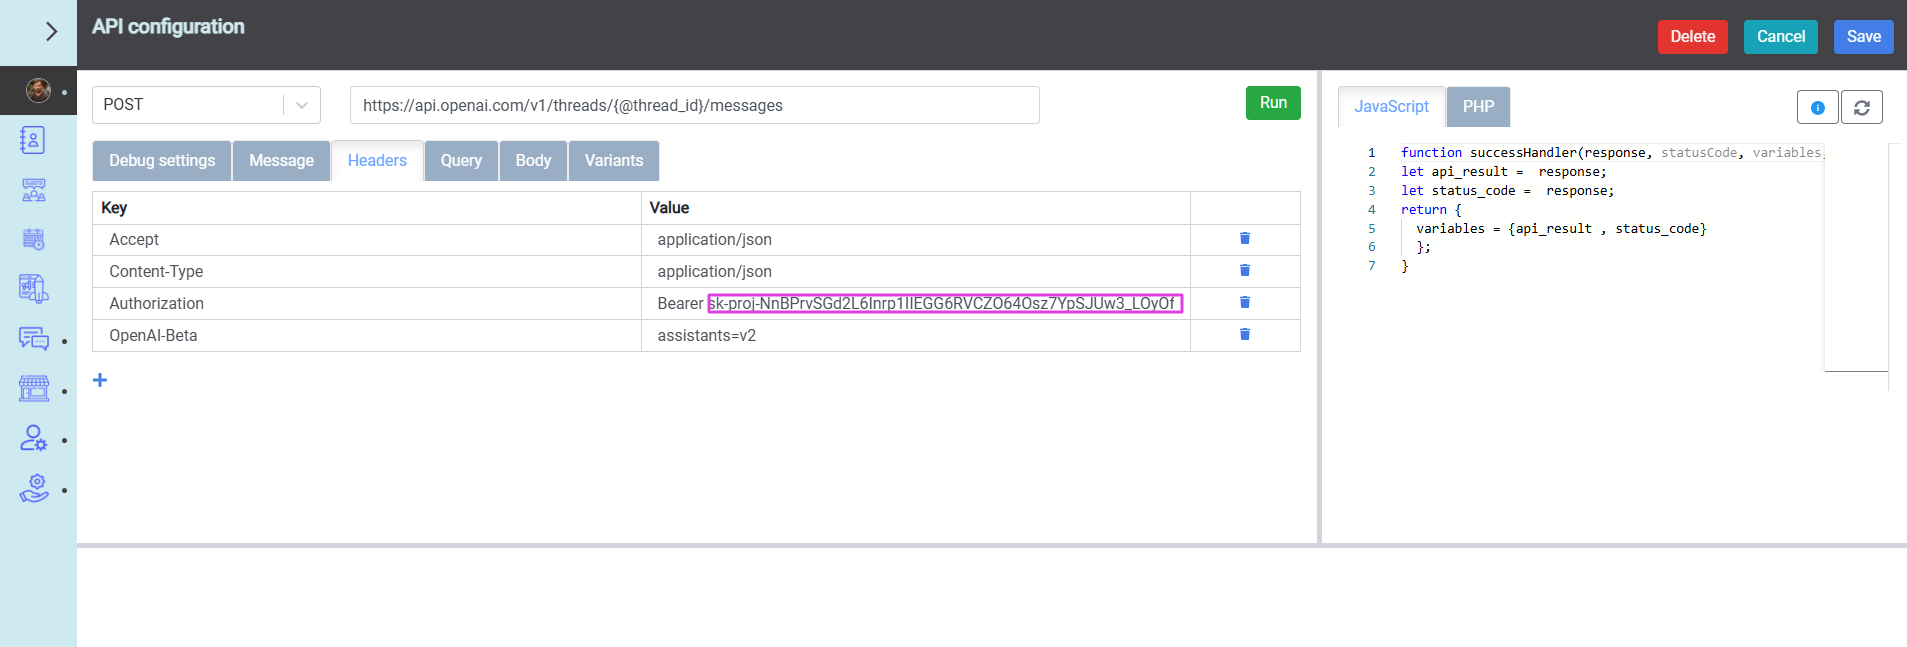
In the authorization header, replace the OpenAI platform's API key with your own.
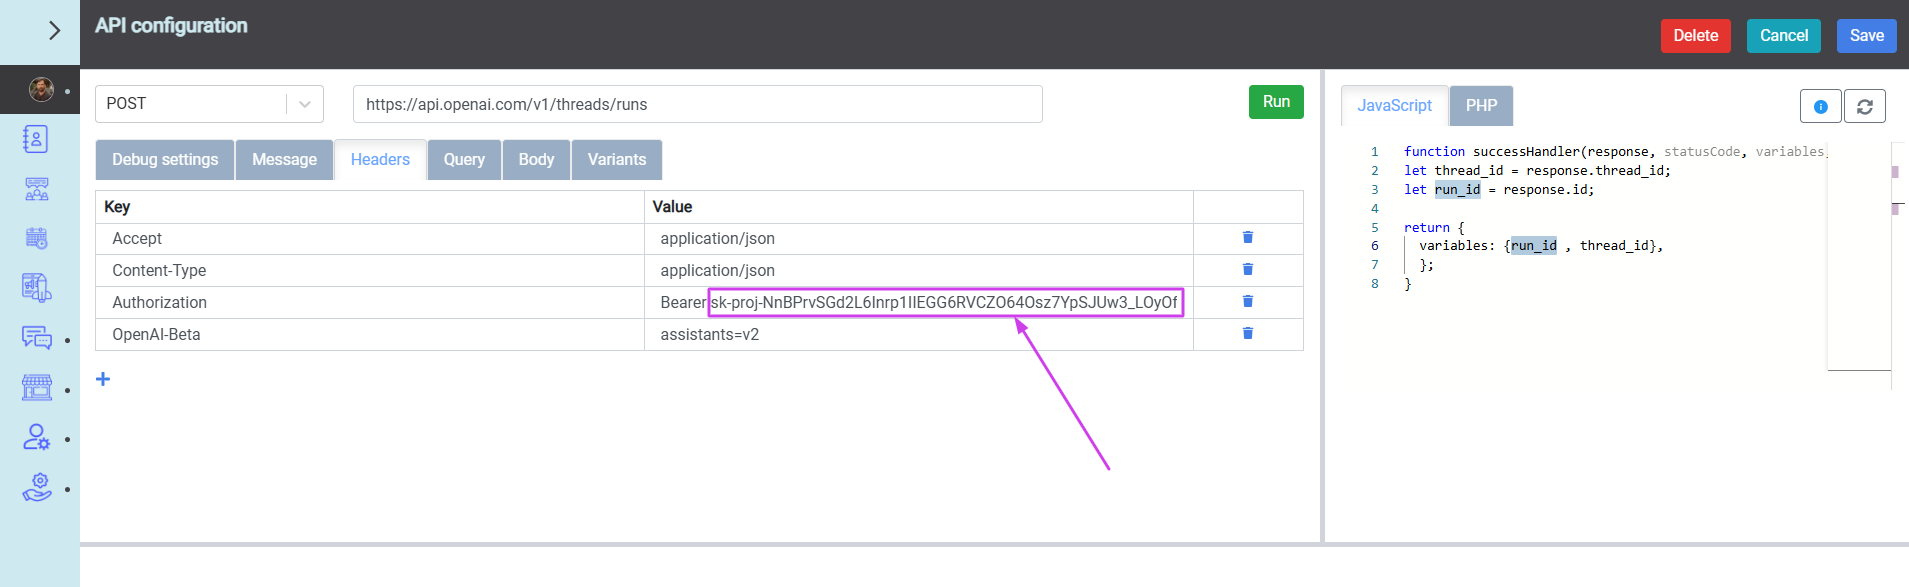
Next, the assistant should be created, and its ID should be retrieved. It is also necessary to select the GPT model for the assistant.
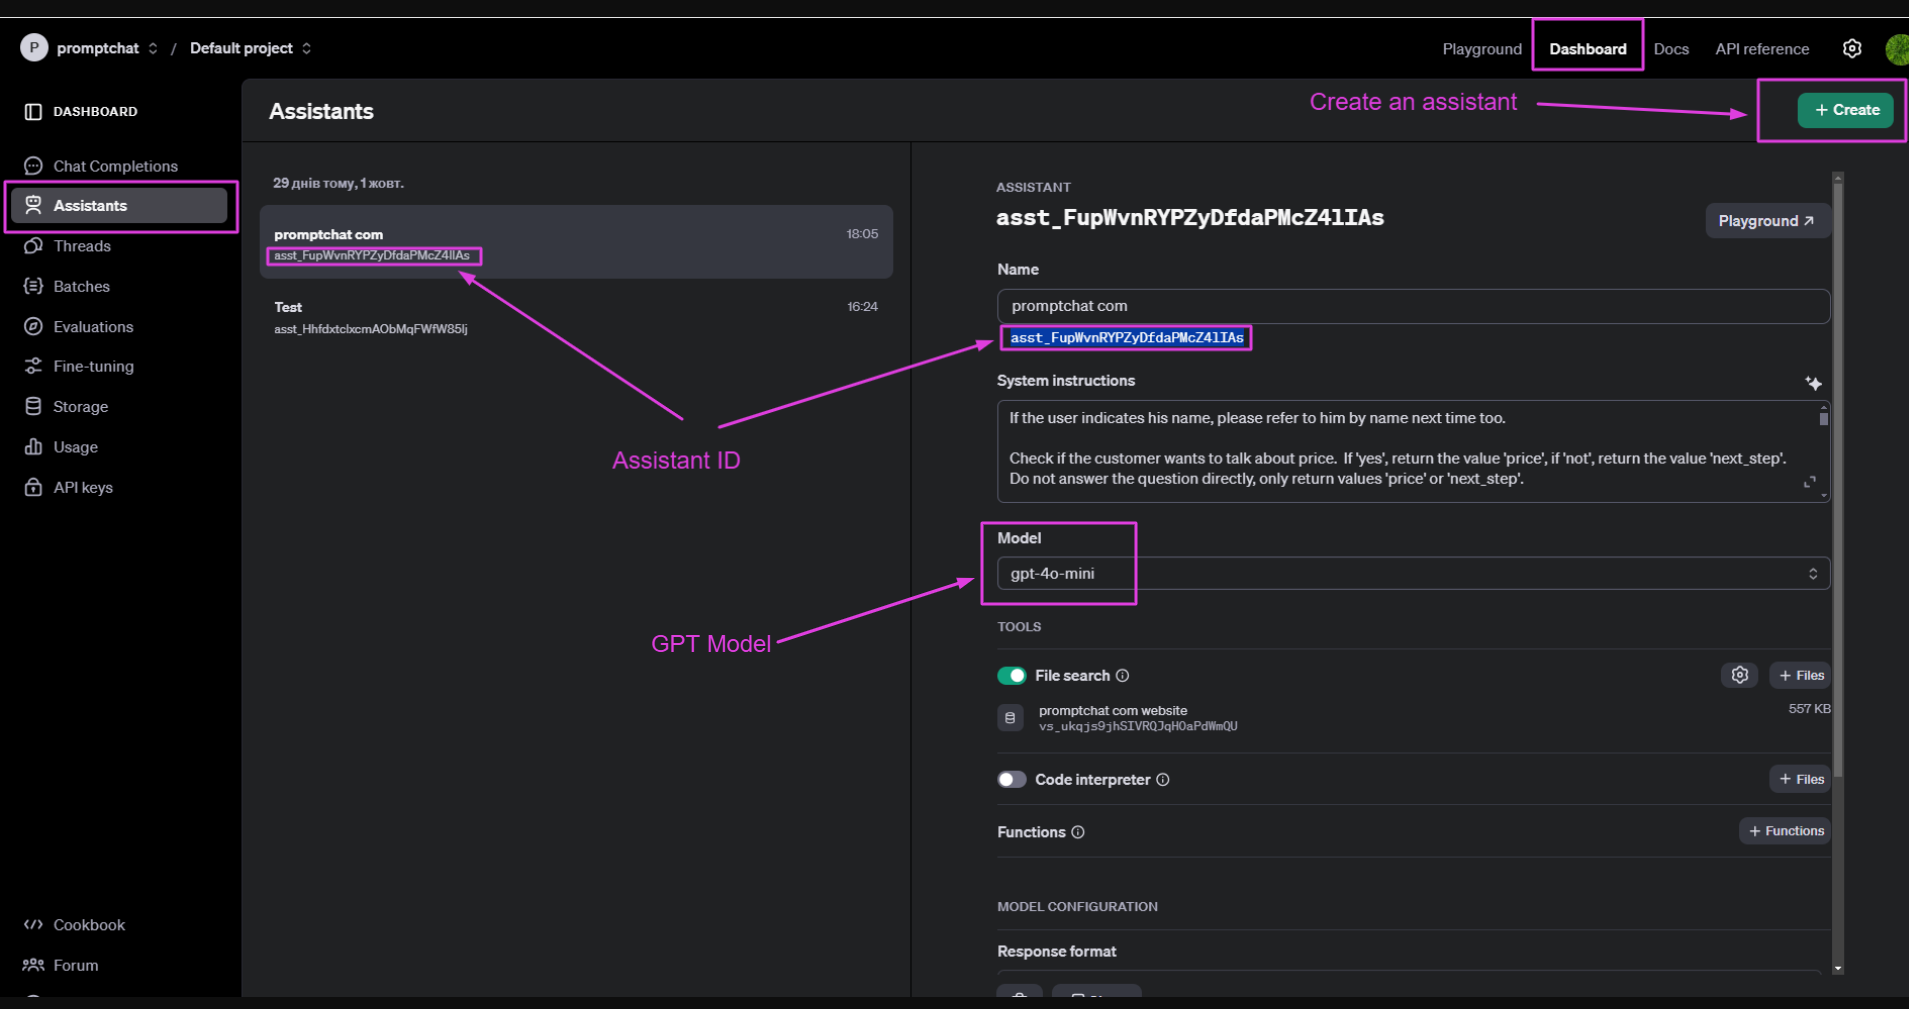
In the body of the request, it is necessary to specify the model, temperature and assistant_id.
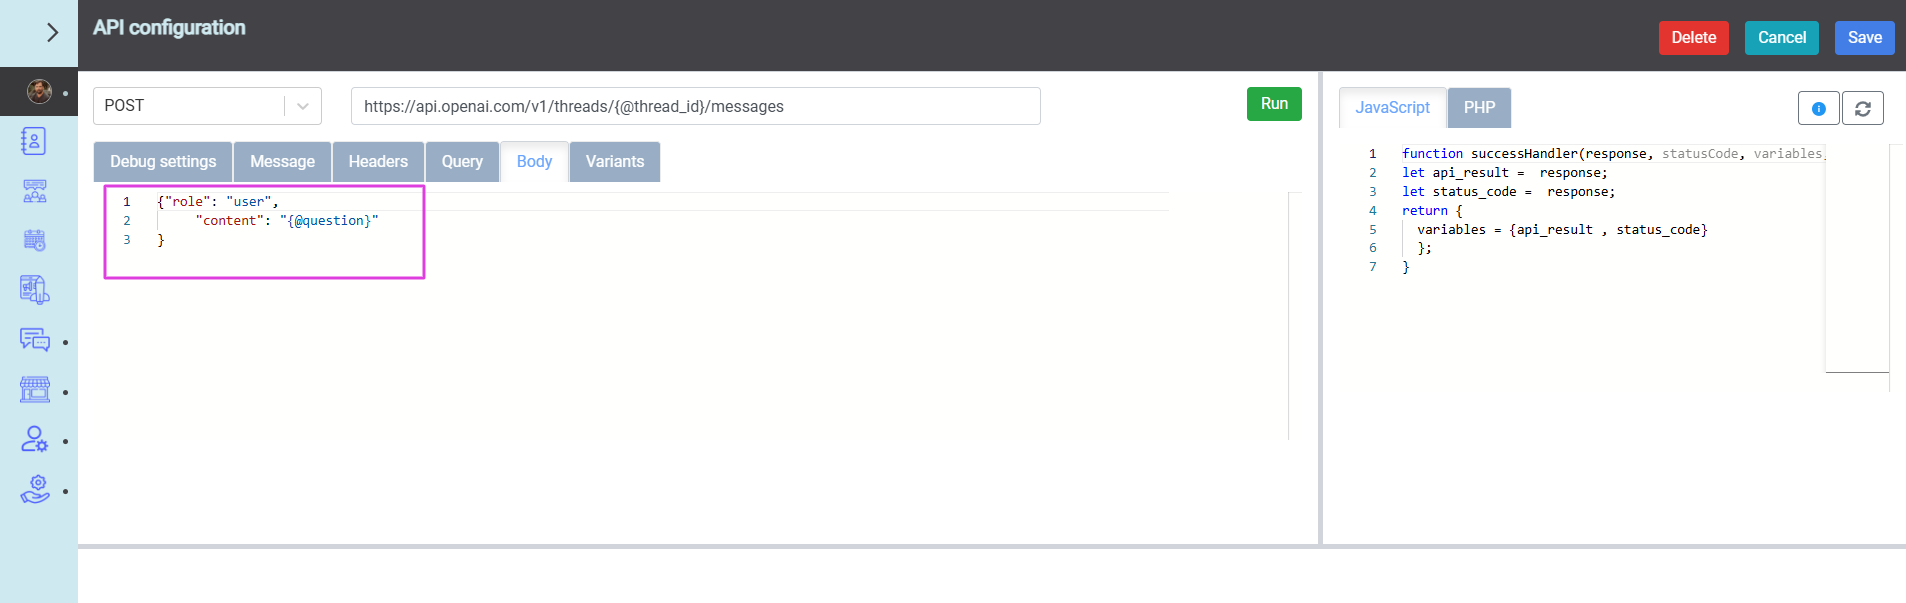
Also, the variable containing the customer's question must be placed in the content.
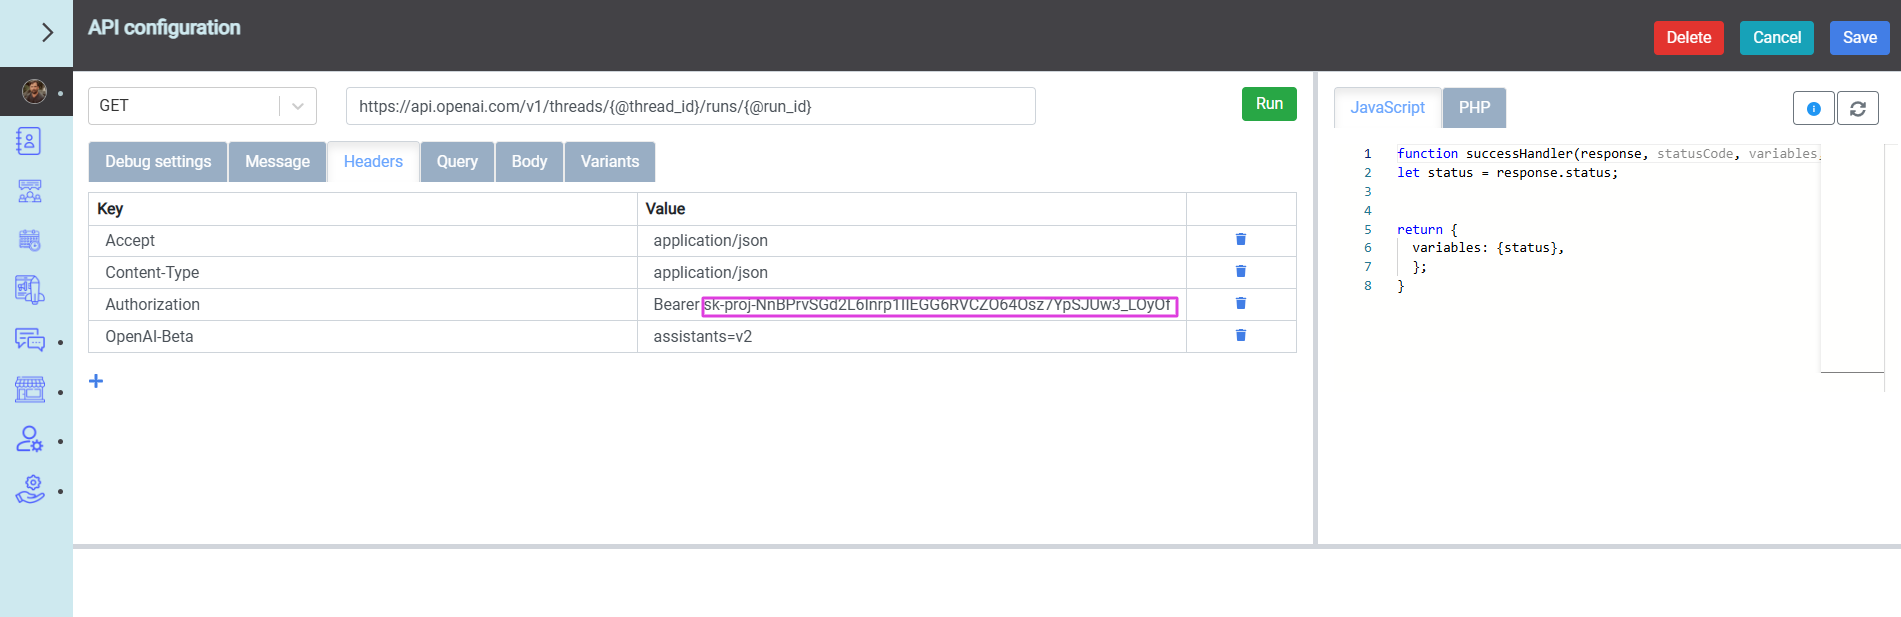
[4] - API block. This request checks the status of the previously created Run.
In the authorization header, replace the OpenAI platform's API key with your own.
[5] - This Switch Block checks if the previous request was successfully completed. If successful, the flow proceeds to the next block. If the response indicates failure, the flow returns to the previous block and attempts to execute it again. This loop continues until a successful response is received.
[6] - API block. This request receives a response from GPT chat.
In the authorization header, replace the OpenAI platform's API key with your own.
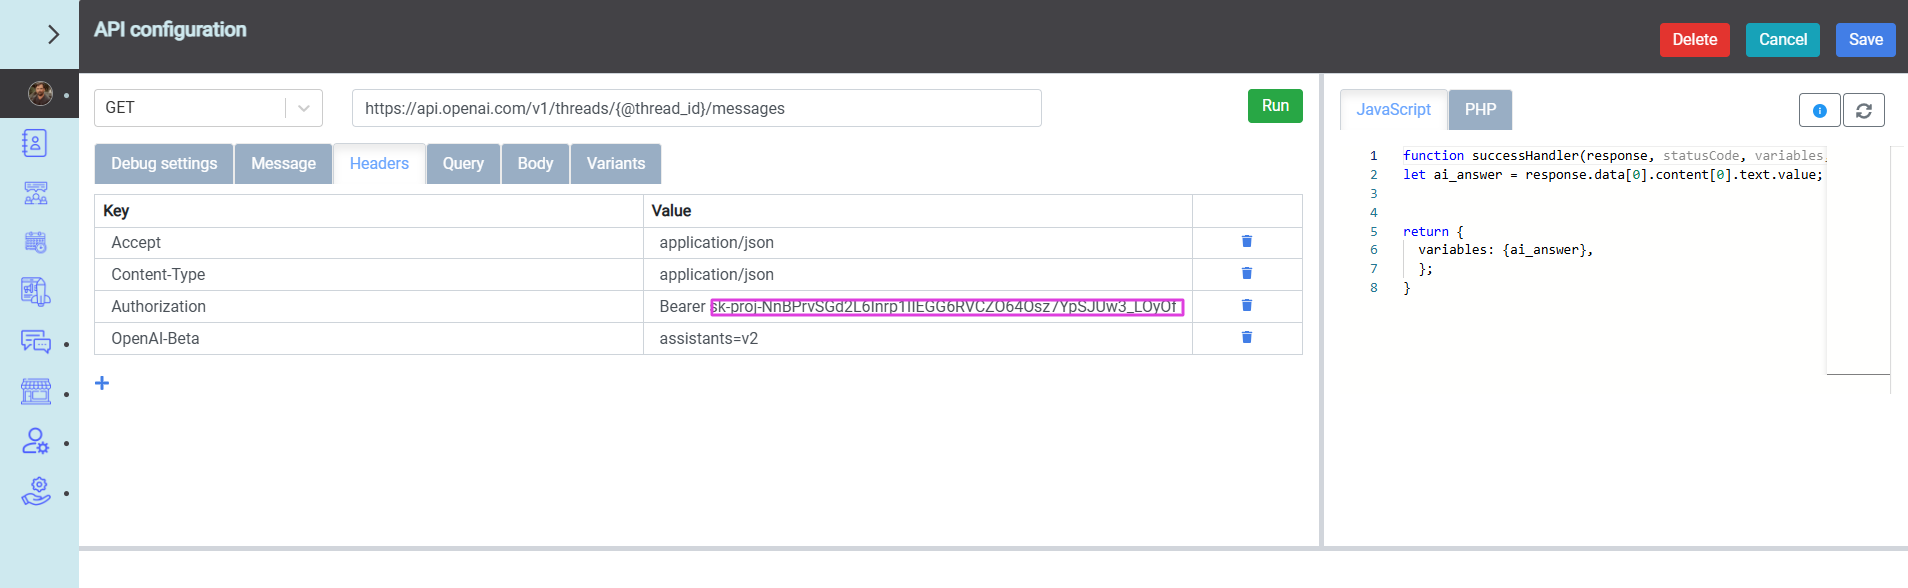
[7] - Message block. Output of the GPT chat response that was written to a variable.
[8] - Question block. The client’s response to this block will be written to the variable specified in this block. This block will be used for the client’s second and all subsequent questions.
*Note that the 'question block' can be left empty without text, but it will still wait for the client to enter a question
[9] - API block. This apiblock sends next client’s question.
In the authorization header, replace the OpenAI platform's API key with your own.
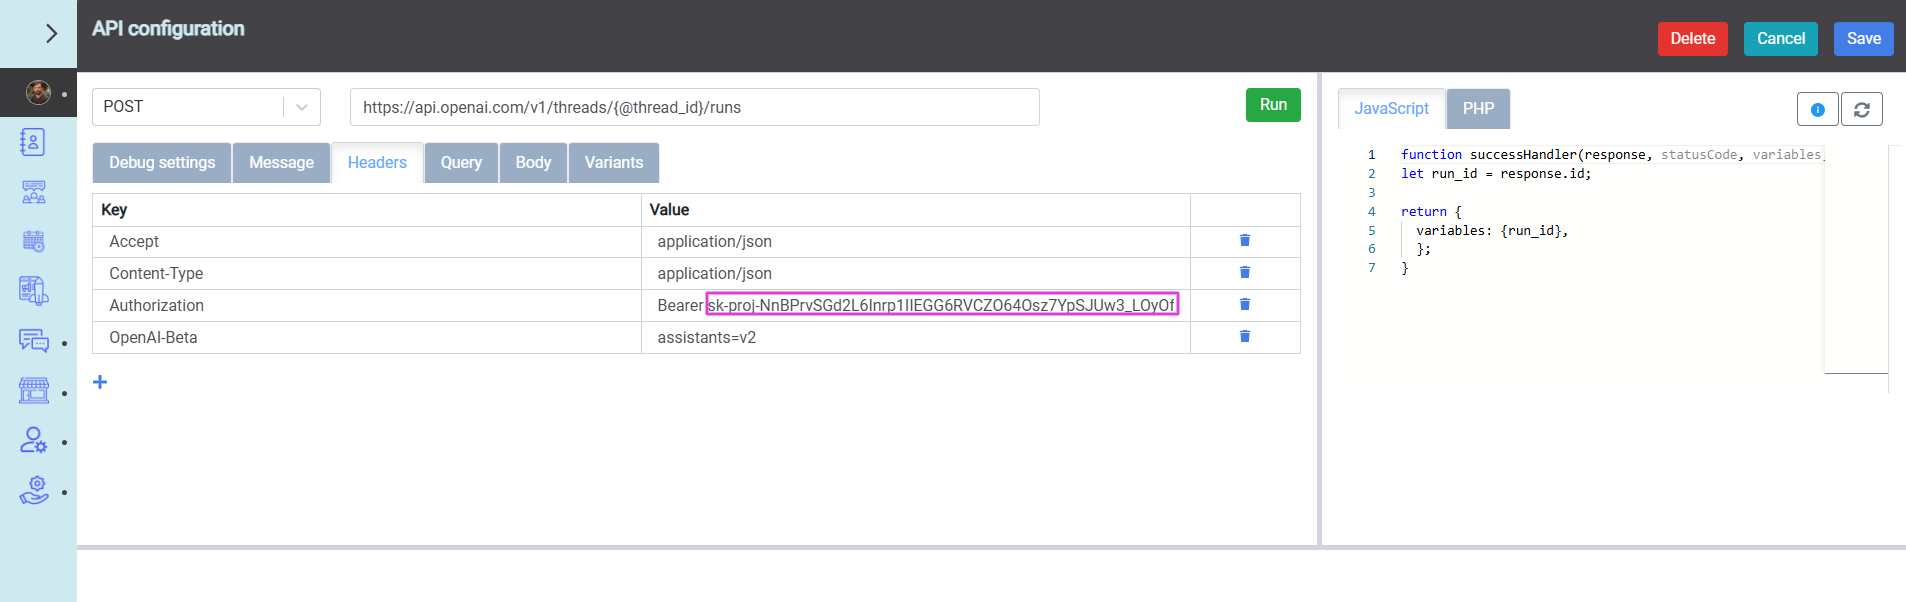
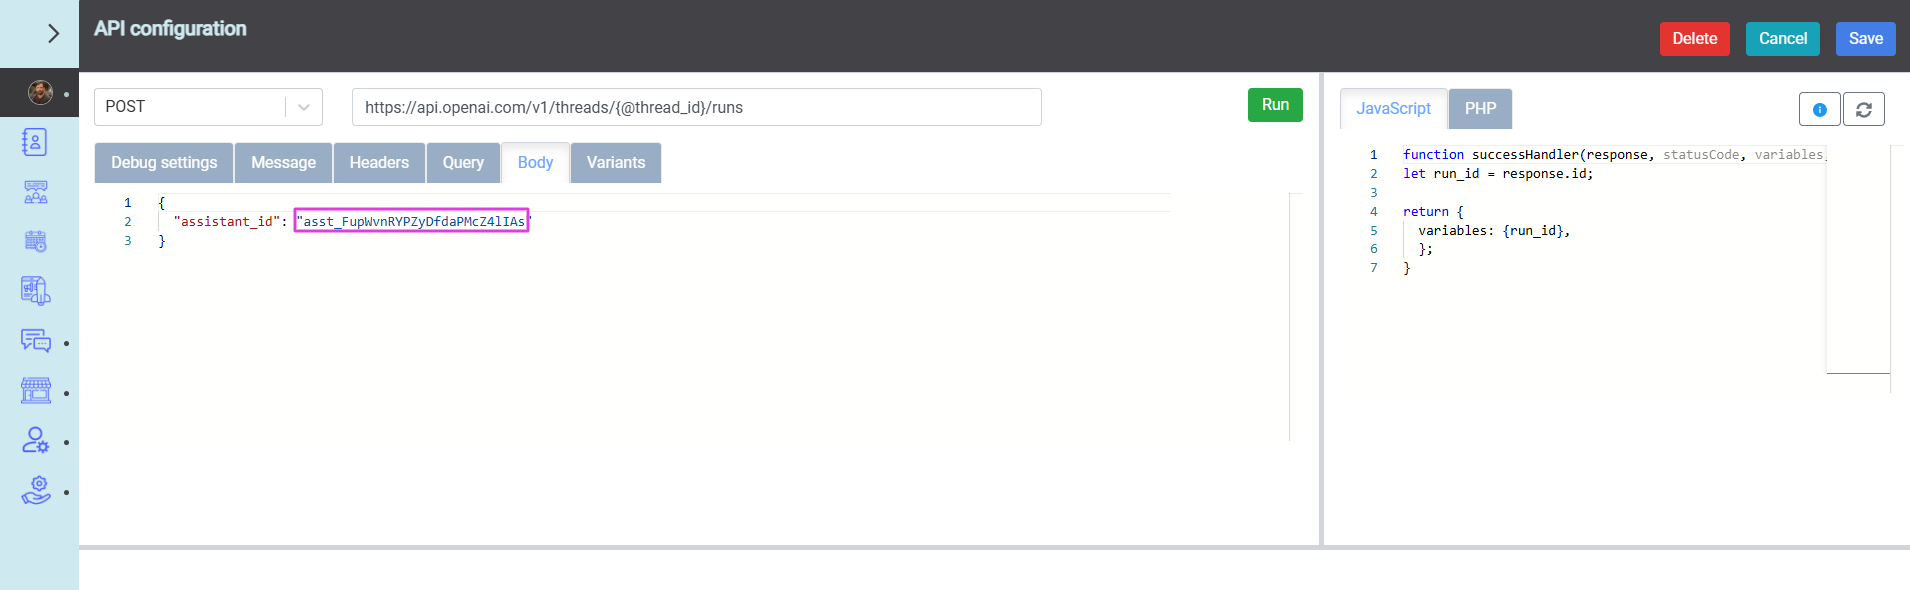
[10] - API block. This request must be made to start the Run and get the new 'run_id'.
In the authorization header, replace the OpenAI platform's API key with your own.
In the body of the request, it is necessary to specify the assistant_id.
After this request, the flow is returned to the [4] block and thus an incessantGPT chat is obtained.
[11], [12], [13] - Trigger word blocks. These blocks contain trigger words. If the client enters any of the words specified in the "Trigger word" blocks, then the current flow of the chatbot is interrupted and goes to the block containing the entered word.
You can add blocks and modify the chatbot according to your needs. This chatbot is given as an example of minimal GPT configuration.
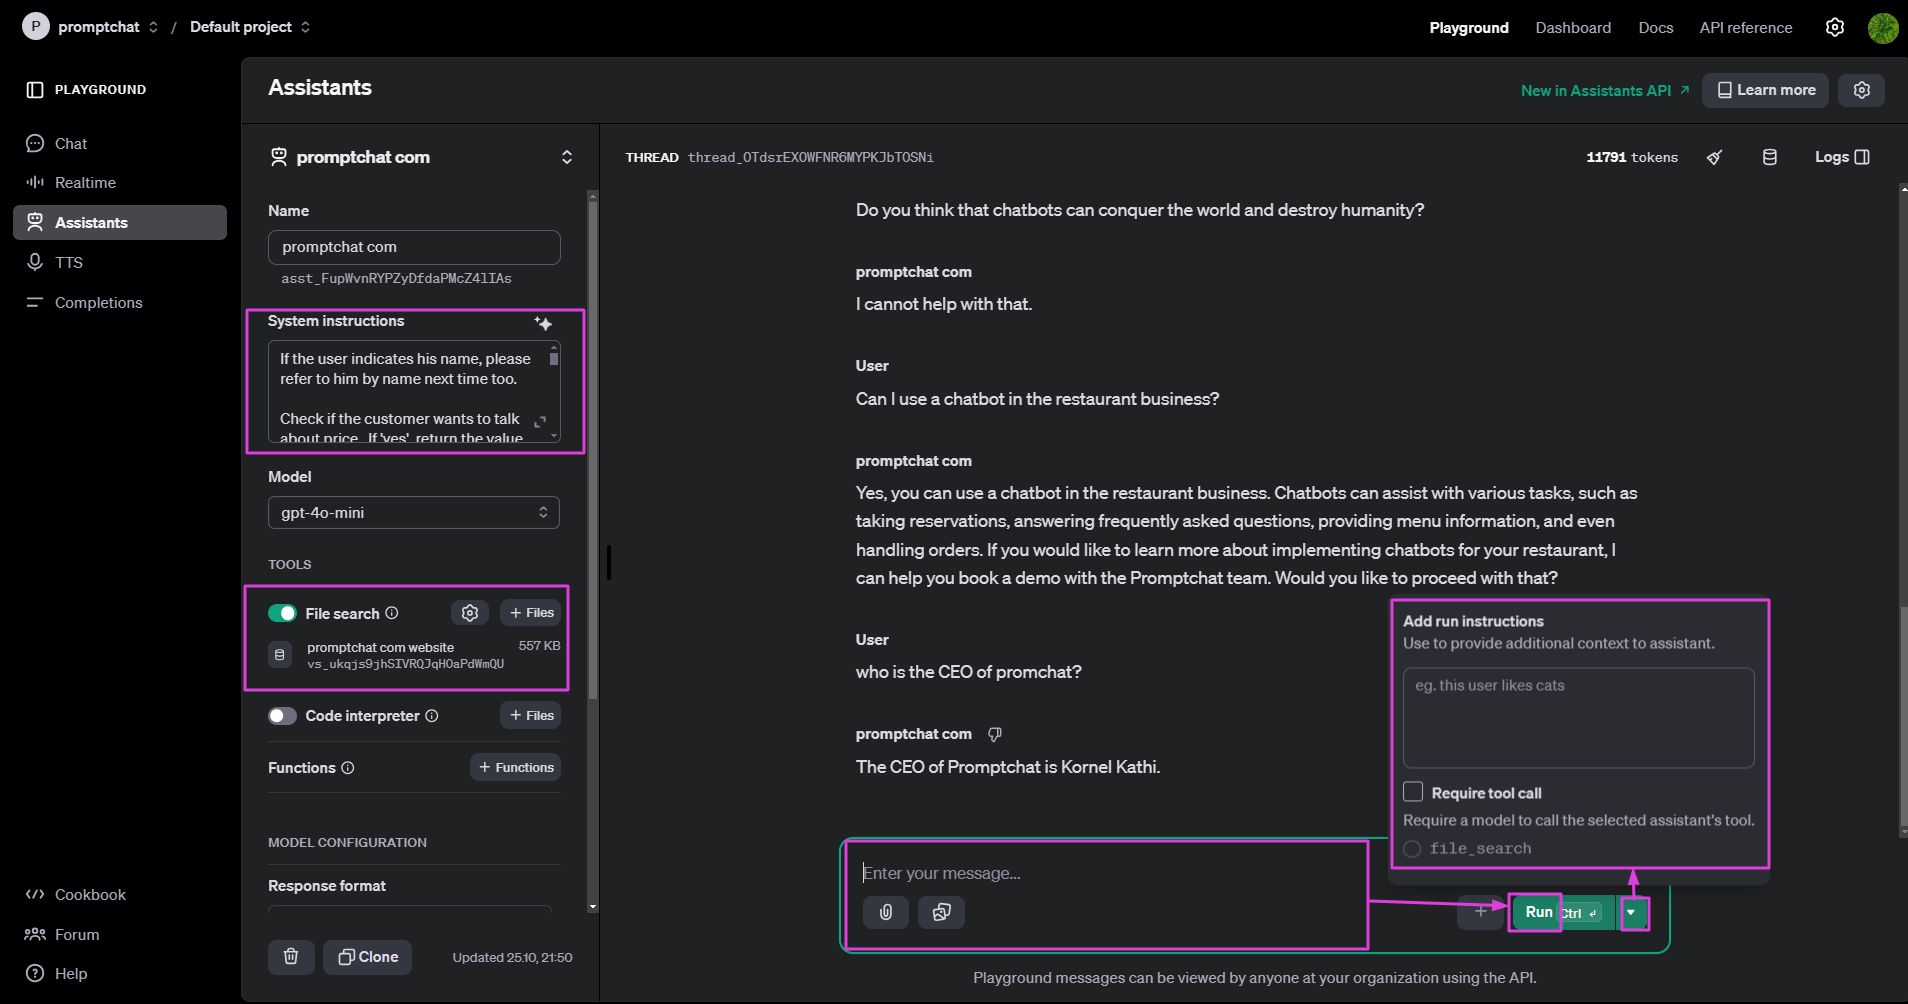
We also recommend exploring the option to train an assistant specifically for answering questions related to your company, services, or products. This customized assistant can help deliver accurate and tailored responses, enhancing user engagement and support.
- Provide system instructions for the Assistant to guide its behavior.
- Upload files with educational information that the Assistant will use as the basis for its responses.
- Test the Assistant by asking questions to see how it performs.
- Add additional context to help the Assistant give more precise and relevant answers.